Ubuntu CT安裝
- 先更新Proxmox。
- 下載最新範本(ubuntu-24.10_standard-1_amd64.tar.zst)
- 建立ubuntu CT,設定好登入密碼(root用)、網路。
- 啟動ubuntu CT,以主控台方式用root登入。
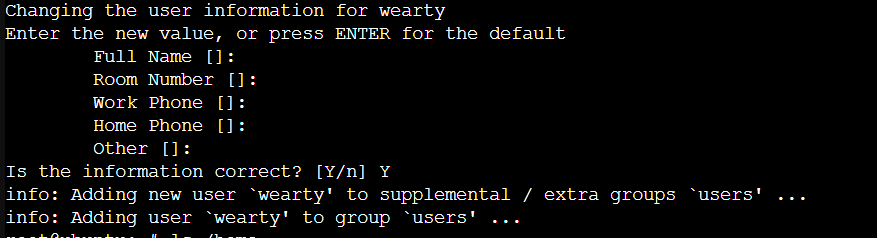
- 建立新使用者
adduser 帳戶名稱 - 輸入完後,設定密碼
- 接著設定帳號的個人資料,可跳過,按“y“結束。
- 利用usermod來進行使用者模式的更動,能夠順利使用sudo -i
$ usermod -aG sudo 帳戶名稱 - 使用sudo -i,取得root權限測試。
- 若要刪除帳戶,使用userdel
$ userdel 要刪除的帳號(只刪除帳戶) - 更新ubuntu裡,apt的套件資訊及列表
$ apt update - 更新已安裝的套件
$ apt upgrade - 確認網卡IP位址
$ ip a - 安裝SSH
$ apt install openssh-server - 設定SSH
$ vim /etc/ssh/sshd_config - 修改設定中三個參數,更改成下方內容。
Port 22 -> SSH使用的Port,建議不要改
PasswordAuthentication yes
PermitRootLogin yes -> 是否開放 root 登入 - 登出,試試用其他帳號進行遠端連線


$ userdel -r 要刪除的帳號(連同檔案一同刪除)
- 安裝apache
$ sudo apt install apache2 apache2-utils - 安裝apache ssl
$ sudo a2enmod ssl - 重啟apache 2 服務
$ sudo systemctl restart apache2
此時已啟用port 443,先安裝net-tools
$ sudo apt install net-tools
可下指令 netstat -tlnp 檢查是否啟用 port 443。
$ sudo netstat -tlnp - 調整 SSL 網站設定檔
$ sudo a2ensite default-ssl.conf
$ sudo systemctl restart apache2 - 此時的SSL憑證(預設測試用)不是合法的,須自行申請合法憑證。
- apache2相關設定檔
一般設定檔
/etc/apache2/apache2.conf
SSL設定檔
/etc/apache2/sites-available/default-ssl.conf - 啟用ufw:
(1)加入規則:
$ sudo ufw allow "OpenSSH"
$ sudo ufw allow "Apache Full"
(2)啟動ufw
$ sudo ufw enable
(3)檢查ufw規則
$ sudo ufw status numbered

SSL 憑證申請
要替換自簽名憑證,可以選擇使用 Let’s Encrypt 免費 SSL 憑證,下面是使用 Certbot 來安裝與配置 Let’s Encrypt 憑證的步驟:
- 安裝 Certbot:
$ sudo apt install certbot python3-certbot-apache - 申請 SSL 憑證:
$ sudo certbot --apache - 輸入電子郵件地址
Certbot 會首先要求你輸入一個電子郵件地址。這是必須的,因為 Let's Encrypt 會通過這個地址來發送更新通知或安全警告。
Enter email address (used for urgent renewal and security notices)
輸入你的電子郵件並按下 Enter 鍵。 - 同意服務條款
接下來,Certbot 會要求你同意 Let's Encrypt 的服務條款:
Please read the Terms of Service at https://letsencrypt.org/documents/LE-SA-v1.5-February-24-2025.pdf. You must agree in order to register with the ACME server. Do you agree?
你需要輸入 y 來同意條款。 - 選擇是否允許共享電子郵件地址
你會被問到是否同意 Let's Encrypt 共享你的電子郵件地址,用於發送來自他們的市場資訊(不是必須的)
Would you be willing, once your first certificate is successfully issued, to share your email address with the Electronic Frontier Foundation, a founding partner of the Let's Encrypt project and the non-profit organization that develops Certbot? We'd like to send you email about our work encrypting the web, EFF news, campaigns, and ways to support digital freedom.
你可以選擇 Y 或 N。 - 選擇需要啟用 SSL 的網站
在接下來的步驟中,Certbot 會列出你伺服器上的 Apache 設定檔(虛擬主機)來讓你選擇要啟用 SSL 的網站。
We were unable to find a vhost with a ServerName or Address of xxx.xxxx.xxx.xxx.xx
Which virtual host would you like to choose?
- - - - - - - - - - - - - - - - - - - - - - - - - - - - - - - - - - - - - - - -
1: default-ssl.conf | | HTTPS | Enabled
2: 000-default.conf | | | Enabled
- - - - - - - - - - - - - - - - - - - - - - - - - - - - - - - - - - - - - - - -
Select the appropriate number [1-2] then [enter] (press 'c' to cancel):
你可以選擇 1 或 2 - 自動更新:
Certbot 自動安裝了 cron job,使 SSL 憑證能在到期時自動更新。你可以手動檢查更新是否順利:
$ sudo certbot renew --dry-run
MariaDB 安裝設定
- 先到官網下載頁面選擇您要安裝的作業系統、版本以及要安裝的 MariaDB 版本。因本次是安裝在 Ubuntu 24.10,所以選擇 Ubuntu 24.10 "oracular" > 11.8 > OSSPlanet + Ubuntu-TW - Ubuntu 台灣在地推廣組,然後按照畫面出現的指令安裝 apt 儲存庫。
- 安裝金鑰
$ sudo apt-get install apt-transport-https curl
$ sudo mkdir -p /etc/apt/keyrings
$ sudo curl -o /etc/apt/keyrings/mariadb-keyring.pgp 'https://mariadb.org/mariadb_release_signing_key.pgp' - 加入儲存庫:使用 vim 編輯 /etc/apt/sources.list.d/mariadb.sources,
sudo vim /etc/apt/sources.list.d/mariadb.sources
並填寫以下內容。
# MariaDB 11.8 repository list - created 2025-04-07 02:22 UTC
# https://mariadb.org/download/
X-Repolib-Name: MariaDB
Types: deb
# deb.mariadb.org is a dynamic mirror if your preferred mirror goes offline. See https://mariadb.org/mirrorbits/ for details.
# URIs: https://deb.mariadb.org/11.rc/ubuntu
URIs: https://ftp.ubuntu-tw.org/mirror/mariadb/repo/11.8/ubuntu
Suites: oracular
Components: main main/debug
Signed-By: /etc/apt/keyrings/mariadb-keyring.pgp - 安裝MariaDB
$ sudo apt-get update
$ sudo apt-get install mariadb-server - 啟動MariaDB
$ sudo systemctl status mariadb - 初始化MariaDB
$ sudo mysql_secure_installation - 初始化 MariaDB 會需要回答幾個問題,如下:
(1)Enter current password for root (enter for none)
輸入 root 密碼,預設 MariaDB 沒有密碼,可直接按 enter。
(2)Switch to unix_socket authentication [Y/n]
切換到 unix_socket 身份驗證,這是在 10.4.3 版新增的身份驗證方式,沒有強制使用,輸入 n。
(3)Change the root password? [Y/n]
修改資料庫 root 帳號密碼,輸入 y。
(4)New password
輸入要設定的 root 帳號密碼。
(5)Re-enter new password
再輸入一次輸入要設定的 root 帳號密碼。
(6)Remove anonymous users? [Y/n]
移除匿名帳號,輸入 y。
(7)Disallow root login remotely? [Y/n]
不允許遠端使用 root 帳號登入,考量安全性應該要輸入 y。
(8)Remove test database and access to it? [Y/n]
移除測試資料庫與帳號,輸入 y。
(9)Reload privilege tables now? [Y/n]
重新載入權限設定,輸入 y。 - 允許外部連線(可不設定)
(1)編輯 MariaDB 設定檔
編輯 /etc/mysql/mariadb.conf.d/50-server.cnf,找到 bind-address = 127.0.0.1 這一行,在這行前加入 # 註解掉。 修改後,重啟 MariaDB 服務 (sudo systemctl restart mariadb)。
(2)新增資料庫權限
假設外部電腦 IP 為 192.168.0.1,並且設定帳號為 root,密碼為 123456,可以管理全部資料庫,請參考以下指令進行設定。
$ mysql -u root -p
Enter password: [輸入密碼]
GRANT ALL PRIVILEGES ON *.* TO 'root'@'192.168.0.1' IDENTIFIED BY '123456' WITH GRANT OPTION;
FLUSH PRIVILEGES;
(3)開啟 3306 Port
sudo ufw allow 3306 - 常用指令
$ sudo systemctl enable mariadb # 開機自動啟動服務
$ sudo systemctl start mariadb # 啟動服務
$ sudo systemctl stop mariadb # 停止服務
$ sudo systemctl restart mariadb # 重新啟動服務
$ sudo systemctl status mariadb # 查看服務狀態 - 詳細的帳號權限設定,可以參考以下文章:
MySQL / MariaDB 資料庫使用者帳號管理 SQL 語法教學與範例
- 安裝php及其函數庫
$ sudo apt install php libapache2-mod-php php-mysql php-intl php-soap php-mbstring php-zip php-gd php-json php-curl php-bcmath php-xml php-opcache php8.3-xml php8.3-xmlrpc - 確認PHP版本
$ php -v - 修改最大變數至少5000
$ sudo vim /etc/php/8.3/apache2/php.ini
搜尋 max_input_vars
/max_input_vars
至少改為5000以上
max_input_vars = 5000
最大容量限制修改為 1G
post_max_size = 1024M
upload_max_filesize = 1024M
存檔離開
:wq
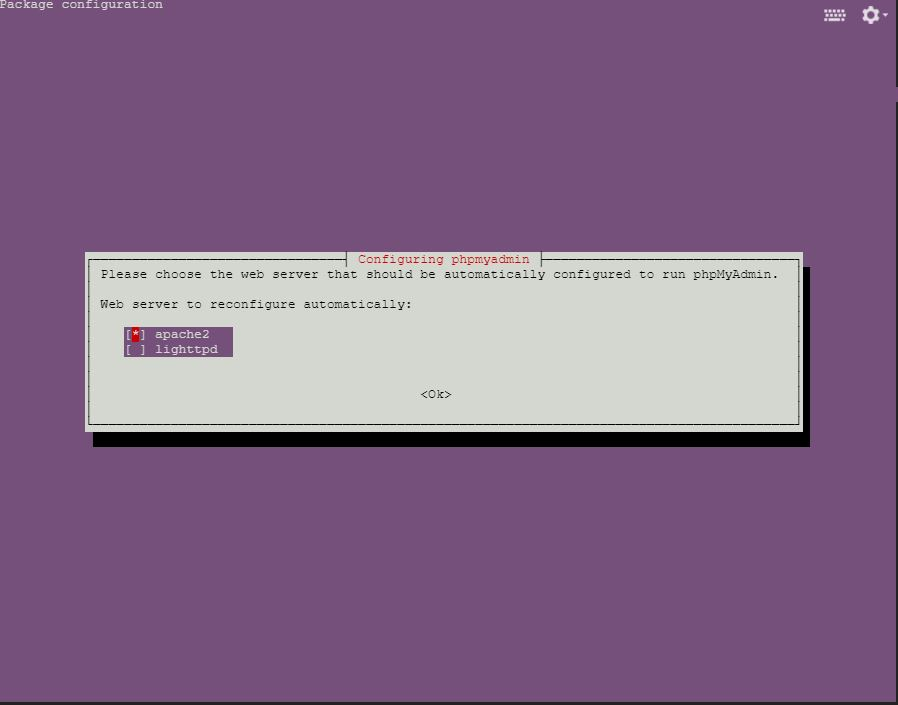
- 安裝 phpmyadmin
$ sudo apt install phpmyadmin - 安裝過程畫面
選擇 apache2,其旁邊會多一個星號 [*]
選擇 Yes 並按 Enter
MySQL application password 僅在 phpMyAdmin 內部用於與 MySQL 通信使用。可以將此留空,系統會自動生成密碼。只需按 ENTER 繼續。 - 啟用 PHP 的擴展 mbstring
$ sudo phpenmod mbstring - 重新啟動 Apache
$ sudo systemctl restart apache2


- 下載moodle
$ sudo wget https://download.moodle.org/download.php/direct/stable500/moodle-latest-500.tgz - 解壓縮到指定目錄
$ sudo tar xvfz moodle-latest-500.tgz -C /var/www/ - 將此目錄的所有者更改為與Web服務一起運行的用戶
$ sudo chown -R www-data:www-data /var/www/moodle
$ sudo chmod -R 755 /var/www/moodle - 建立Moodle數據的目錄
$ sudo mkdir /var/moodledata - 更改此目錄的所有者 Moodle
$ sudo chown -R www-data:www-data /var/moodledata
$ sudo chmod 770 /var/moodledata - 建立資料庫
$ sudo mysql -u root -p
$ create database moodle charset utf8mb4 collate utf8mb4_unicode_ci;
建立操作用戶
$ create user moodleuser@localhost identified by 'password123';
給予權限
$ grant all privileges on moodle.* to 'moodleuser'@'localhost';
離開
$ quit - 分別修改Apache2的設定:
$ sudo vim /etc/apache2/sites-available/default-ssl.conf
$ sudo vim /etc/apache2/sites-available/000-default.conf
將下列內容
DocumentRoot /var/www/html
改為
DocumentRoot /var/www/moodle - 可用網頁方式進行moodle 設定。
https://網址/ - 設定好moodle後,安裝下列程式:
$ sudo apt install aspell graphviz ghostscript poppler-utils - 在moodle中,網站管理→主機→系統路徑
到 PHP CLI 的路徑 → /usr/bin/php8.4
du的路徑 → /usr/bin/du
到拼字檢查程式 aspell 的路徑 → /usr/bin/aspell
dot的路徑 → /usr/bin/dot
到ghostscript的路徑 → /usr/bin/gs
Path to pdftoppm → /usr/bin/pdftoppm
到 Python 的路徑 → /usr/bin/python3


<VirtualHost *:80>
ServerName xxx.xxx.xxx.xxx
Redirect permanent / https://xxx.xxx.xxx.xxx/
</VirtualHost>
<VirtualHost *:443>
ServerAdmin webmaster@localhost
ServerName xxx.xxx.xxx.xxx
DocumentRoot /var/www/moodle
ErrorLog ${APACHE_LOG_DIR}/error.log
CustomLog ${APACHE_LOG_DIR}/access.log combined
SSLEngine on
SSLCertificateFile /etc/letsencrypt/live/xxx.xxx.xxx.xxx/fullchain.pem
SSLCertificateKeyFile /etc/letsencrypt/live/xxx.xxx.xxx.xxx/privkey.pem
Include /etc/letsencrypt/options-ssl-apache.conf
<FilesMatch "^(FUNDING\.yml|\.stylelintrc|composer\.json|composer\.lock|phpunit\.xml\.dist|UPGRADING\.md|upgrade\.txt|README(\.md|\.txt)?|environment\.xml|install\.xml)$">
Require all denied
</FilesMatch>
<DirectoryMatch "^/var/www/moodle/(\.github|\.upgradenotes|fixtures|behat|tests|node_modules|vendor)">
Require all denied
</DirectoryMatch>
<Directory /var/www/moodle>
Options -Indexes
AllowOverride All
Require all granted
</Directory>
<FilesMatch "\.(cgi|shtml|phtml|php)$">
SSLOptions +StdEnvVars
</FilesMatch>
<Directory /usr/lib/cgi-bin>
SSLOptions +StdEnvVars
</Directory>
<IfModule mod_headers.c>
Header always set X-Content-Type-Options "nosniff"
Header always set X-Frame-Options "SAMEORIGIN"
Header always set X-XSS-Protection "1; mode=block"
</IfModule>
</VirtualHost>
- 建立 Apache 虛擬主機設定檔
$ sudo vim /etc/apache2/sites-available/moodle.conf
貼上以下內容(請將網域改為你自己的): - 啟用 Apache 模組
$ sudo a2enmod ssl
$ sudo a2enmod rewrite
$ sudo a2enmod headers
$ sudo a2enmod deflate - 啟用虛擬主機設定
$ sudo a2ensite moodle.conf
若預設的 000-default.conf 或 default-ssl.conf 還啟用,建議停用它們避免衝突:
$ sudo a2dissite 000-default.conf
$ sudo a2dissite default-ssl.conf - 重新啟動 Apache
$ sudo systemctl reload apache2 - 檢查設定是否正確生效
$ sudo apache2ctl configtest
若顯示:
Syntax OK 代表設定無誤,可正常使用。
